or: our DIY experiences with slate siding on the cabana.
Let me start by saying that we didn’t work previously with slate. And; this cabana is our first shed and timber frame project we built ourselves.
In retrospect, we would have done some things differently (or not). But I’ll get into that later. If you are a qualified, experienced slater or timber frame builder who can make a nice contribution to this blog: please do so in the comments below.
SLATE IS AMAZING!!
We’re so glad to have chosen slate siding for our cabana, because:
- it is easy to handle in terms of size and weight (1 slate = 1 kg)
- it can be cut or sawn into the required fit
- it requires no maintenance
- it is well priced
- it looks very nice
- it’s a traditional building material in our region
- it’s mined at ± 40 km from our house
There are some disadvantages too:
- slate requires a lot of preparatory thinking
- the quarry where we bought the slate did not deliver
- you need some specific tools and hanging material that are difficult to obtain in Portugal
- the material is brittle, vulnerable to transport.
- there are only a few tutorials on the internet about how to slate. (So little that after a long search, I found a video that I myself directed more than 15 years ago, and was completely forgotten: portrait of a slater in dutch)
slate

Slate is a stone, found deep underground. It is clay that has transformed itself for millions of years under pressure from the layers above it. Slate is mined in quarries. A vein of slate runs in Galicia and northern Portugal and there are several quarries here. Southeast of Porto a large quarry is situated at Valongo. Its slate has a very dark gray color, almost black. This slate, therefore, bears the same name: Valongo. At Arouca is a quarry as well, where they mine the same slate. Other colors of slate come from other areas of the world.
The dug slate is sawn and chopped in various sizes. For example, there are large, thick sheets that are used on roofs and floors. Then there are slate tiles in different sizes and forms that are used on roofs, along dormers or as wall siding.
And you also find a kind of wall tile that is cut across the line of the material, it can oxidize and become rust-brown. These are often used as decorative wall cladding indoors.
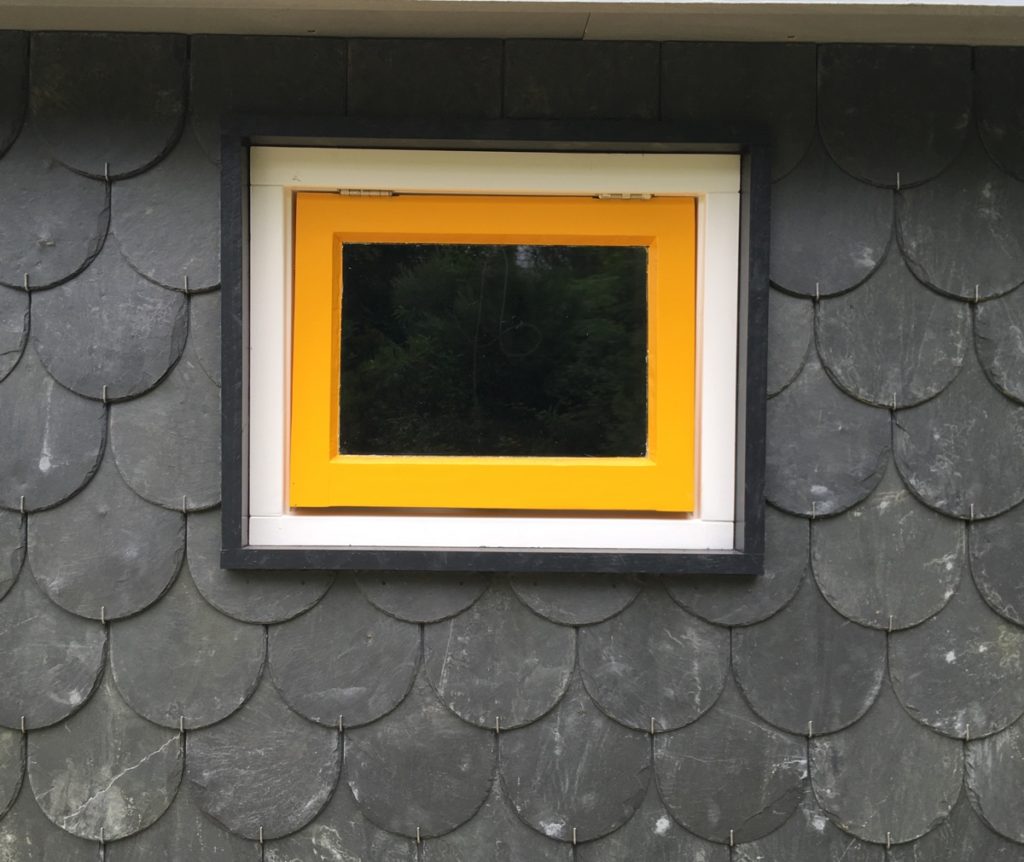
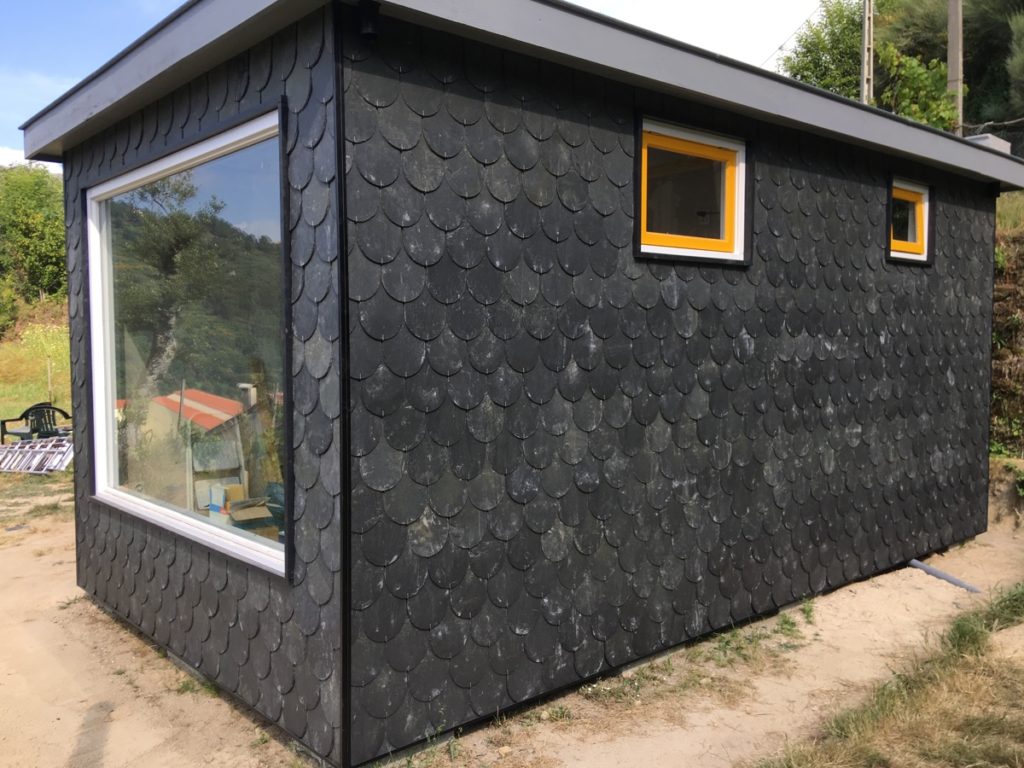
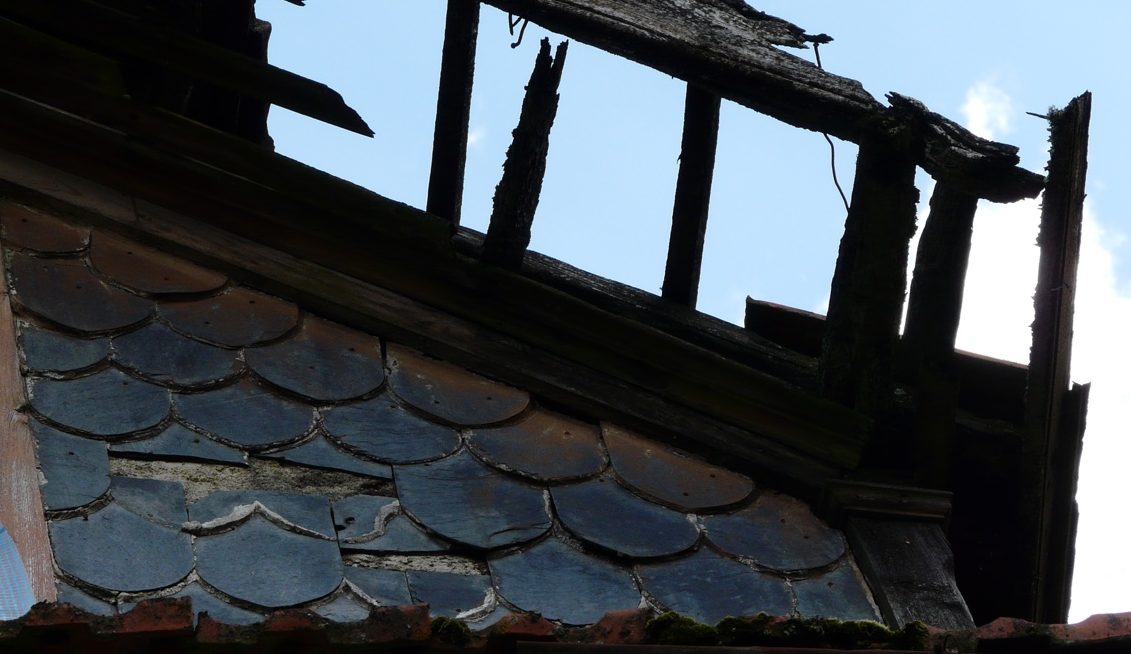
Because ‘soletos’ were used for the dormer windows in our ruins, we also chose these for the cabana. Although the old form (tongue in a sharp point) is no longer made today.
suppliers and prices
We have visited both the quarry at Valongo and Arouca in advance. Arouca turned out to be slightly cheaper and closer to us. And above all; the romantic idea that the slates come from ‘our’ mountains.
The slates cost € 0.50 each. Which, according to the company, is around € 17/m2. The slates are about 2/3 in length on top of each other, so you’ll have 3 layers of slate on the wall. Now that is a bit different from the tongue shape of our slates. Besides, we chose a smaller overlap, to get it more similar to the old-style siding on our ruin.
We bought some extra slates, but I must say that the loss for the edges, breaks and failures was not too bad. That is ± 5%. For 70 m2 of cladding we paid ± € 1200 on the slate.
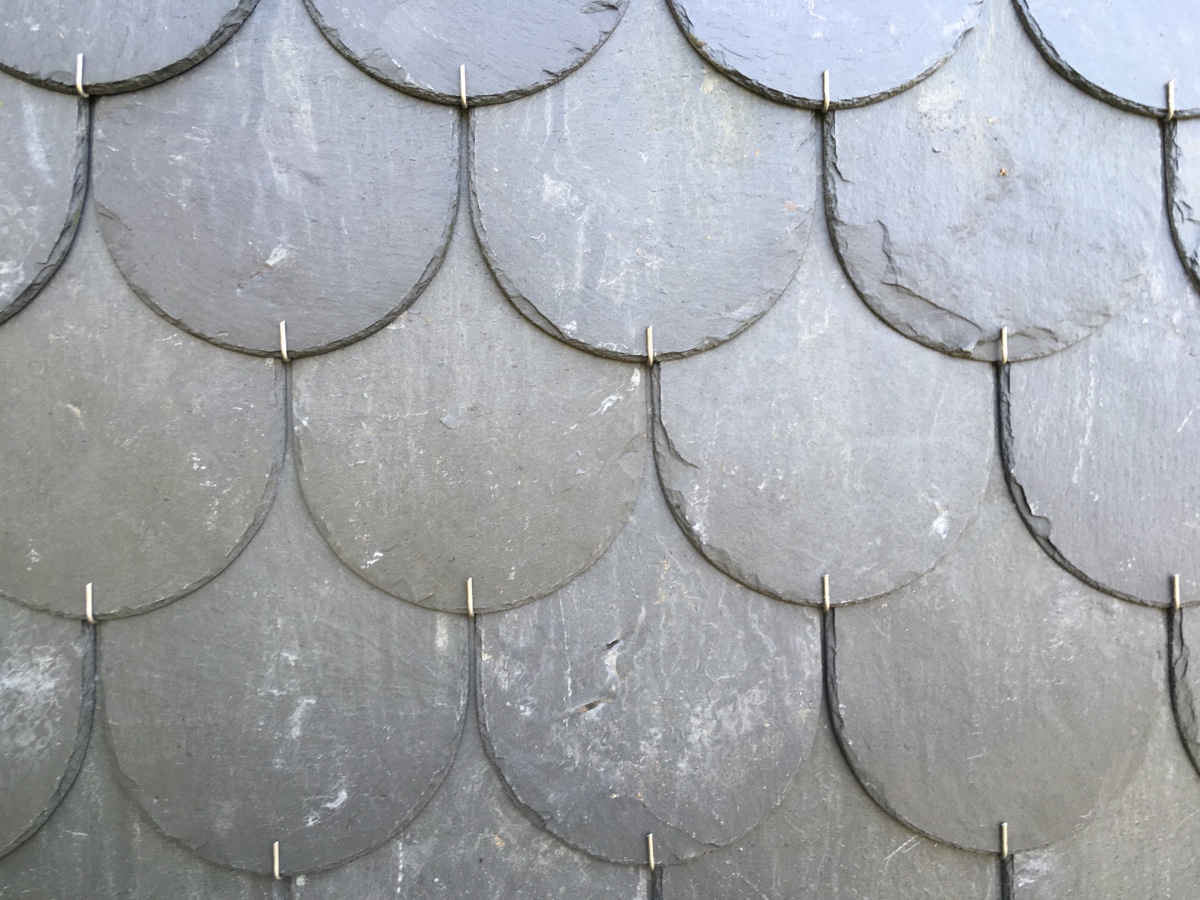
The slates can be glued to a stone wall, or hung on battens with nails or hooks. We chose the latter because a hook has a dual function: it not holds the slate which hangs in it, and it also holds the slate underneath and beside it, in place.
For the finishing of the corners and the lower edge we used metal profiles that are black coated. It eases the finishing, and gives also extra protection against the wind and rain.
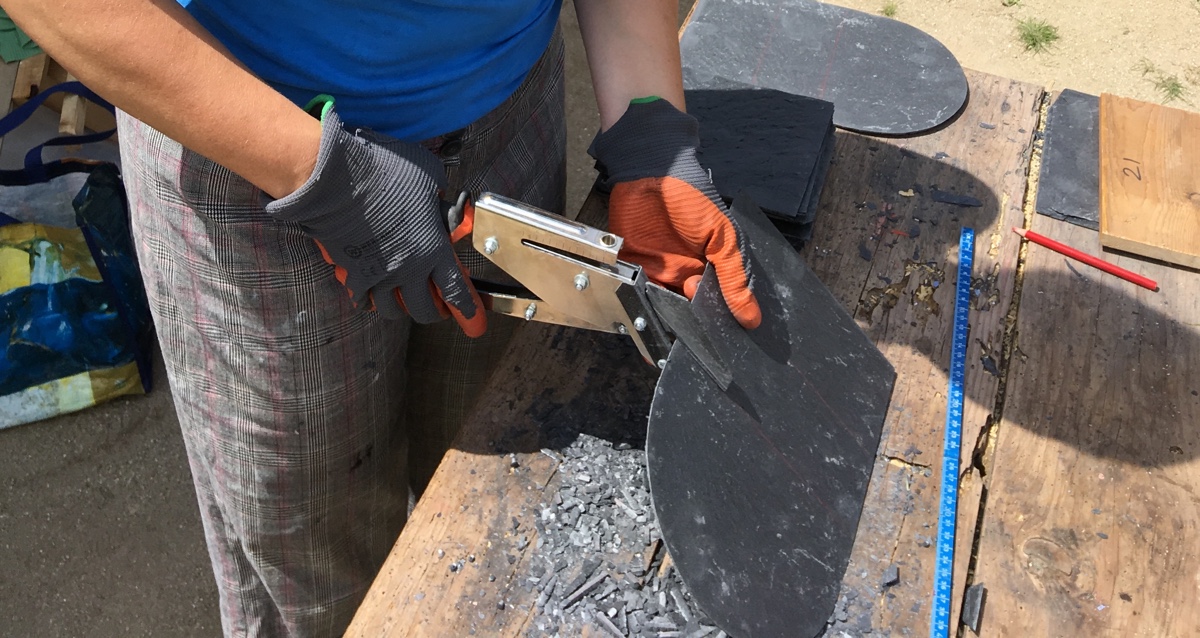
Finally, we have purchased a special slate hammer and a special slate cutter. You don’t want to clad without these. With the cutter you make perfectly round holes in slates you can not hang using a hook. And it cuts the slates beautifully in the desired size. It just needs a little lubrication with WD-40 now and then.
After a long search, we bought the pan battens, the zinc strips, the hooks, the hammer and the cutter at Alcupi in Spain. Great store that also delivers in Portugal. (they speak English too) We have been there once because we have a friend living nearby. The area turns out to be a slate mecca! If you seek inspiration, every house there is covered with slate.
Preparation slating
The preparation for slating is more or less the same as for tiling. You want to avoid having to cut the slates into 1 cm strips. And you also want to prevent your field from becoming misled. And ensure that the horizontal lines of the slates run nicely round the corner.

delivery 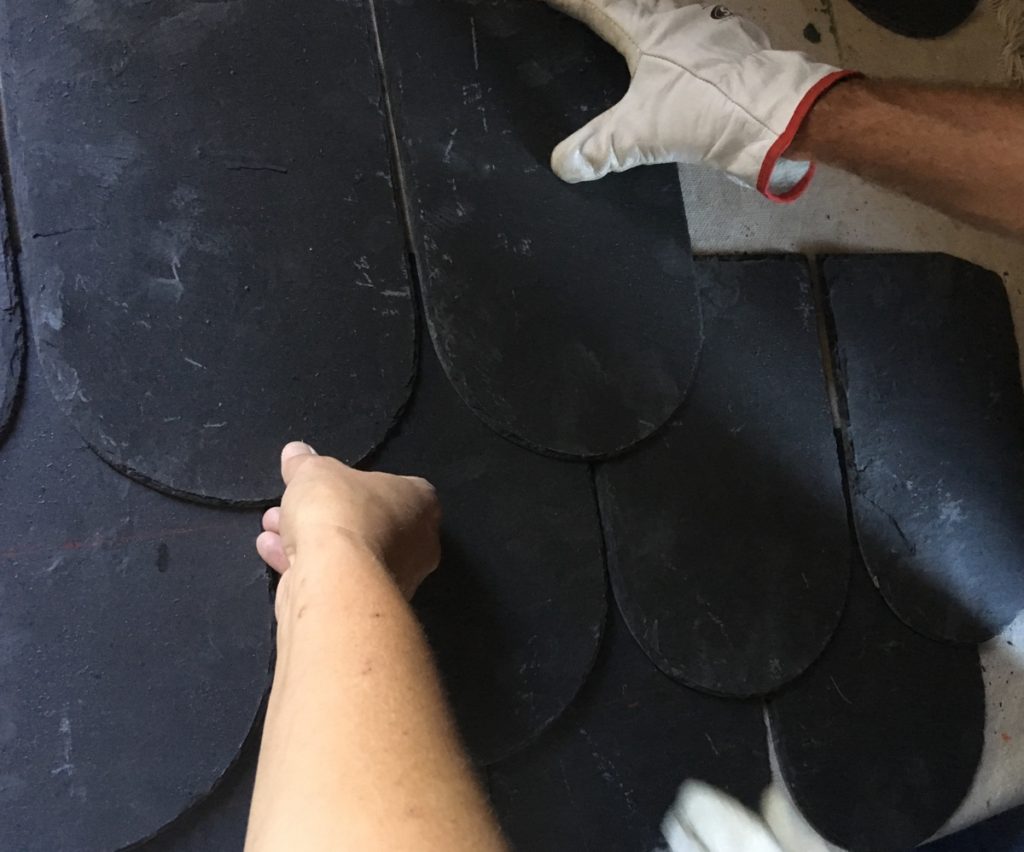
testing 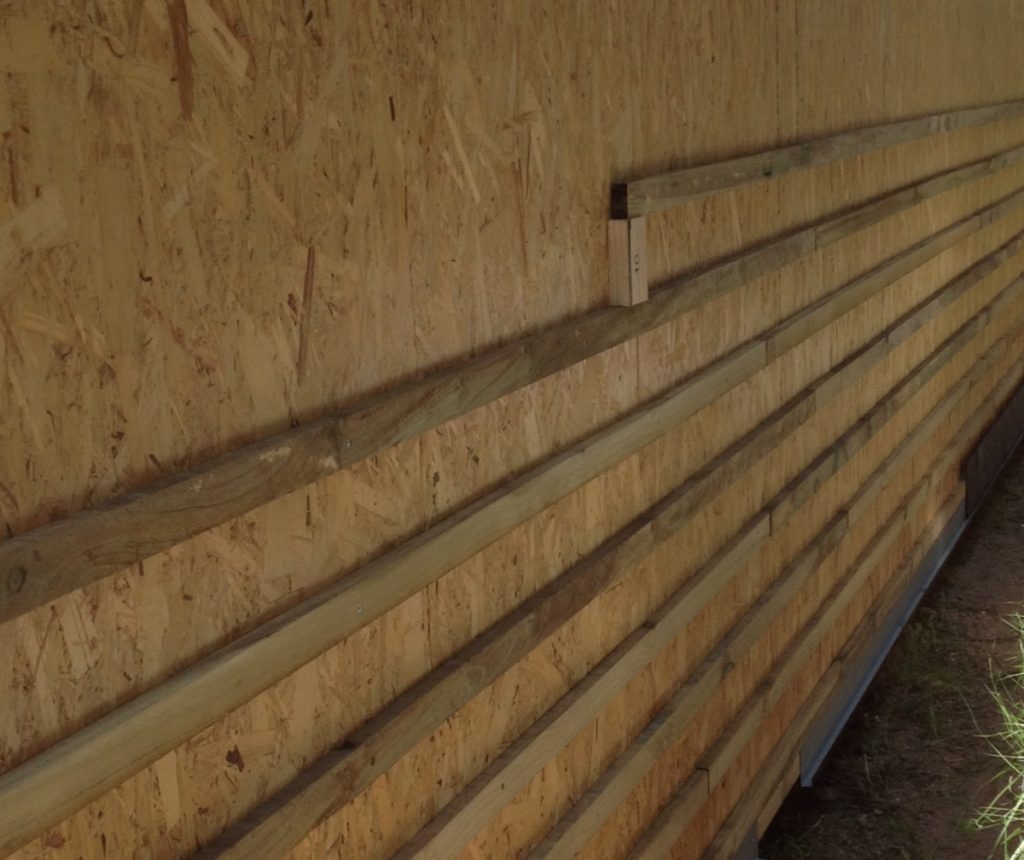
fixing battens
We bought ourselves a cross line laser and it turned out a big help here. In addition, we had to think carefully in advance at what distance we had to hang the battens. (That has to do with the length of your hooks and how far you want the slates to overlap) For this we made various molds to work quickly.
On each batten we put a level line with a chalk rope. We even went as far as to place crosses on it where the hooks had to be placed. A prof probably does not need to, he just does it while slating.

horizontal marking 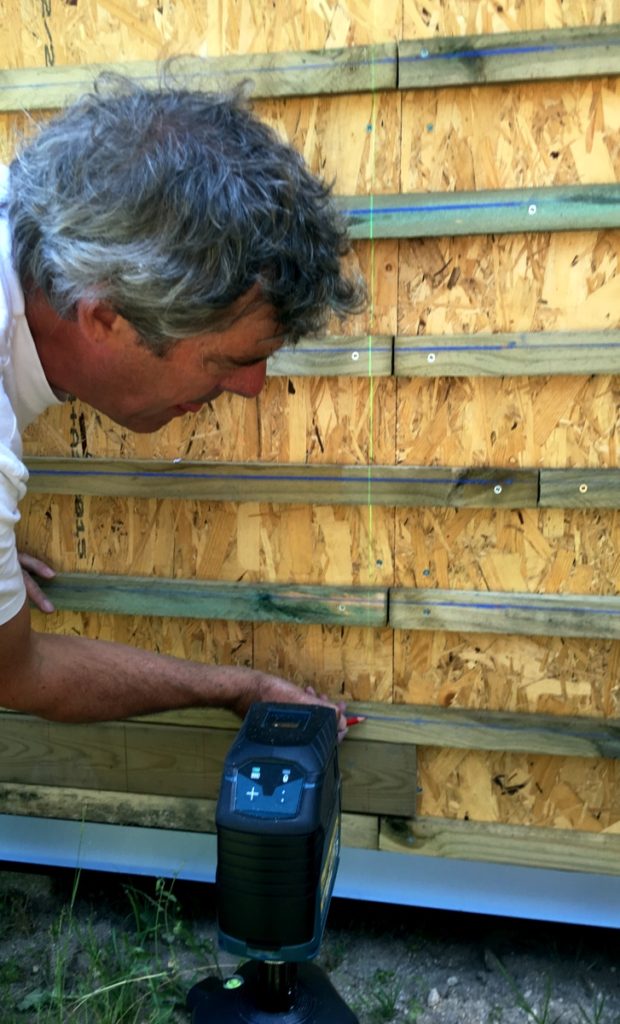
verticale marking 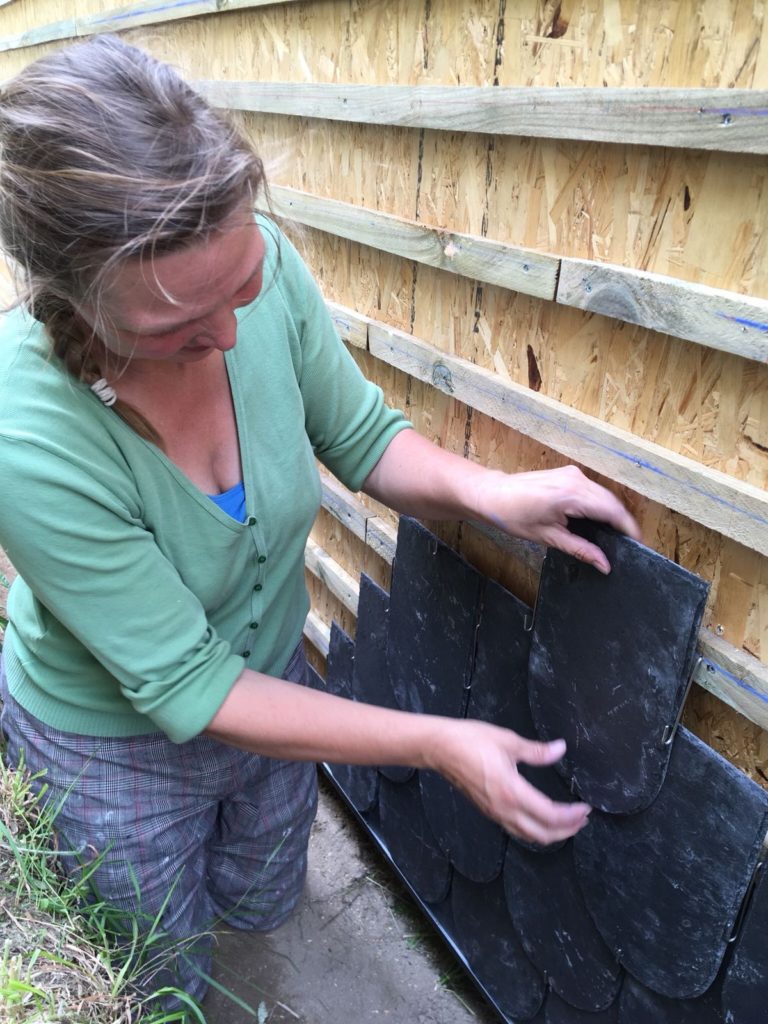
and put it on…
Finally, we also hung profiles at the bottom of the walls to place and secure the first row of slates.
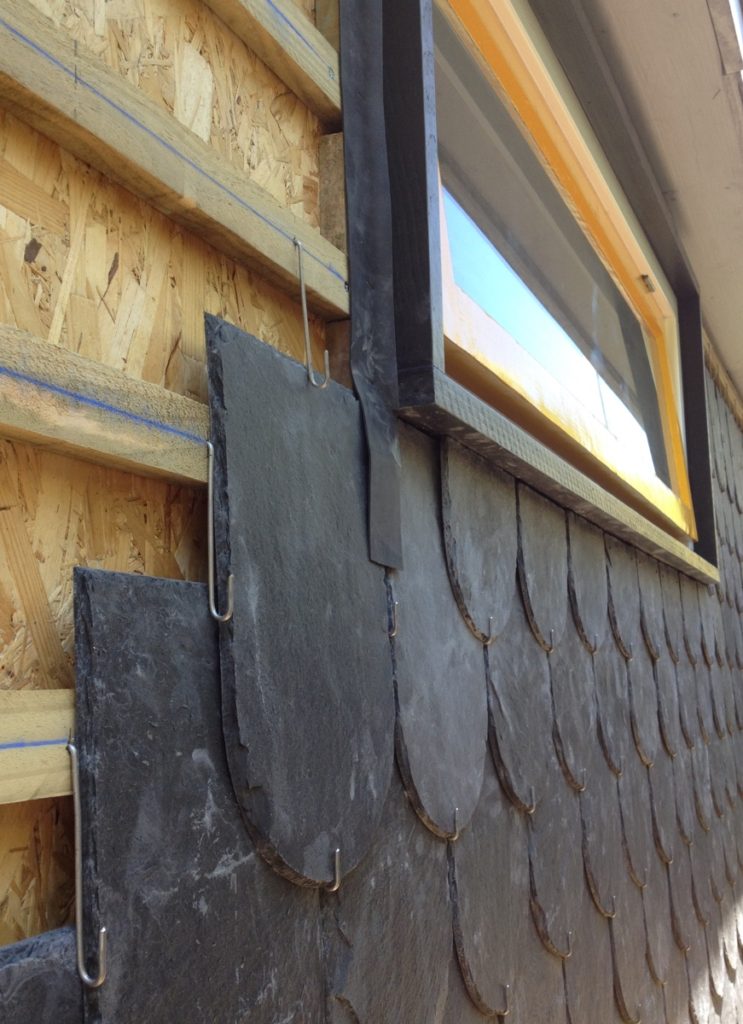
We applied EPDM strips around the windows, which we took from the left-overs of the roof cover. We didn’t find any lead slabs, so this seemed a good alternative.
slating
Slating itself is a nice job. You take a slate, tap it with the hammer to check. If you hear a dull sound there might be a crack in it and you take another.
Then hang it in the hook and immediately fix it with a hook above it.
During the three weeks of slating, Nuno gave me the nickname: Bambam, after the baby of The Flintstones…
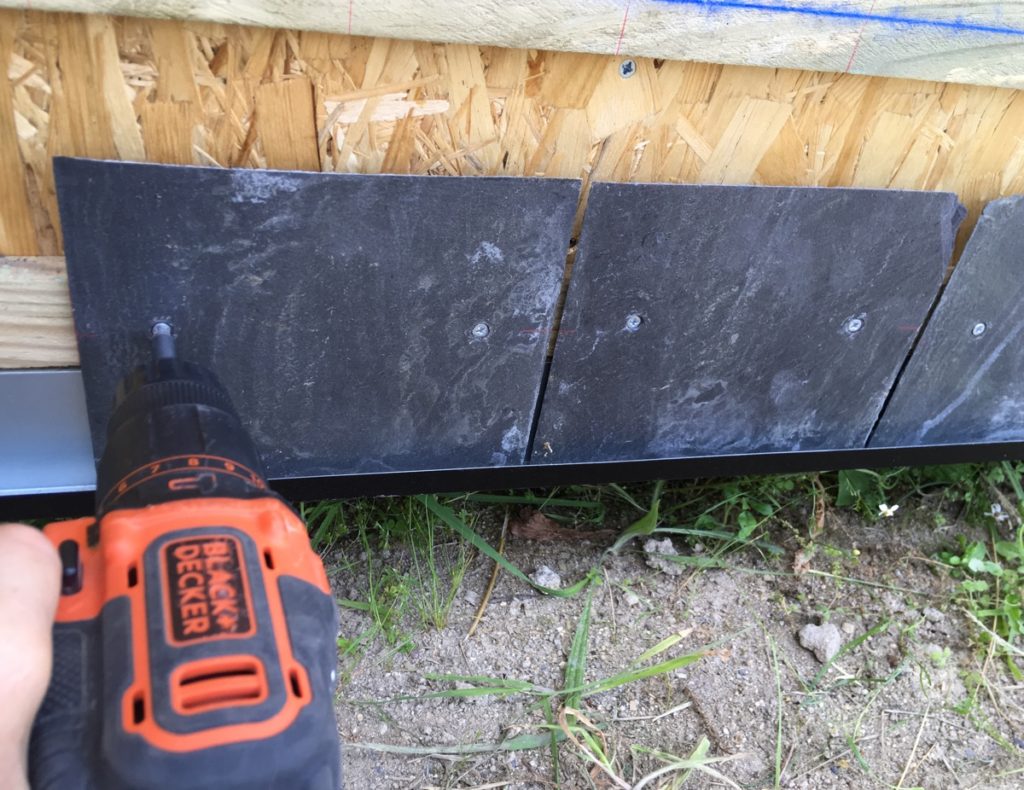
You work from bottom to top, the first row consists of tiles cut in half, which you fix with a screw or a nail. The next row you place half-stone over it. You can work from left to right or vice versa, that doesn’t matter.
Cut slates which can’t be hung with a hook, can be fixed with a screw or nail close to the top of the slate. The next row will cover it.
We have fixed the top row with black galvanized nails.
More info:
youtube channel of Alcupi, with several how-to-video’s.
video on how-to-slate-a-roof, with a good explanation to set up the first rows.
slate-and-tile-hanging-walls
Mistakes
Although being very happy with the result and very enthusiastic about slate, we will do it differently a second time. After the first winter in our cabana we have seen (and smelled) mold on the OSB behind the slate. There can be various causes for this, and we really don’t know which one is the most determining one.
Anyway we would now:
- slate the tiles with a larger overlap
- maybe add a foil to the wall. (still to decide which one and where to place it)
- place counter battens between OSB and the battens, so that moisture can run down.
update Jan. 2020:
The mold is defeated! After we put in two air exhaust fans in the cabana, and drilled some extra holes in the OSB, we don’t smell anymore mold. Although in Northern Portugal, it is a recurring problem. One little crack in the window sealant, and you’ll find mold in the house…
Useful Portuguese words
| slate | ardósia |
| slate tiles | as lousas |
| quarry | pedreira |
| battens | ripas |
| hammer | martelo |
| slate cutter | tesoura para cortar ardósia |
| hooks | ganchos |
| nails | pregos |
Wow, I didn’t know it is so difficult to put slate. Thanks for the explanation!
De nada!
Congrats! Nice share… especially the learnings.
Normally you would install a membrane over the OSB that would avoid the moisture/humidity from getting in.
Obrigada Homero! Your right about the membrane. Although the moist inside comes mostly from the humid that we create with breathing, cooking and showering. That would mean you actually have to place two membranes, one between the plasterboard and the insulation, too.